Monday, December 20, 2010
Power Dome Comes in Handy
Yesterday my "tires are low" light was on during our ride to church (and the car felt like the tire was too low). I pulled over and Scott pulled out the Power Dome, inflated the tire, and we were on our way in about 3 minutes (we weren't even late for church!!). Very handy little item to have (see earlier post).
Friday, December 17, 2010
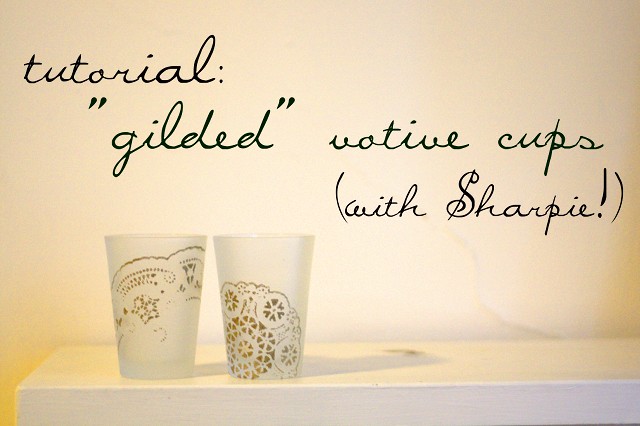
Another great gift idea - gilded votive cups
The Internet is a wonderful thing....I just ran across an idea that is so cool (and seems so easy) that I wish I had found it a few weeks ago. I haven't tried it yet, but it looks fun!!
Basically you need a glass cup/jar/whatever, doily, glue stick, and Sharpie metallic paint pens.

Check out her blog - she has lots of great ideas with tutorials!
Basically you need a glass cup/jar/whatever, doily, glue stick, and Sharpie metallic paint pens.
Check out her blog - she has lots of great ideas with tutorials!
Wednesday, December 15, 2010
Personalized Ornaments
I just bought some beautiful shatterproof ornaments in vivid colors (from Target), and decorated them to give to the kids that I babysit each week. I wrote on them with acrylic paint pens, and drew a few quick Christmas designs.
They turned out great, and best of all, the kids don't need to worry about breaking them!! (Also, my dogs can't eat them!).
They turned out great, and best of all, the kids don't need to worry about breaking them!! (Also, my dogs can't eat them!).
Great Auto Safety Idea
A few months ago we got a portable jumpstarter for both of our cars....it allows you to jumpstart your car from this battery, PLUS it has a compressor (for inflating tires), power invertor, AM/FM radio with IPOD input, and 2 AC and 1 DC outlet (which will allow you to run/charge a laptop or other device). It's just nice insurance for when things go wrong and AAA is far away.
If you have a teenager or youngster driving, this gives peace of mind as well.
There are several different kinds, with different features and levels of wattage. We got the Wagan 400-Watt Power Dome EX via Amazon (currently $110 with free shipping). There is a 200 watt one that is $80 and includes free shipping. Check it out if you are interested!
Saturday, December 11, 2010
A Way to Live
I have always loved this prayer from St. Francis of Assisi, and it is a great way to live. Of course none of us can do these things perfectly, but to the extent that we try, the world will be a better place and we will each be happier. Enjoy!
Lord, make me an instrument of your peace.
Where there is hatred, let me sow love;
where there is injury, pardon;
where there is doubt, faith;
where there is despair, hope;
where there is darkness, light;
and where there is sadness, joy.
O Divine Master, grant that I may not so much seek to be consoled as to console;
to be understood as to understand;
to be loved as to love.
For it is in giving that we receive;
it is in pardoning that we are pardoned;
and it is in dying that we are born to eternal life. Amen.
Thursday, December 9, 2010
Self-Watering Container Gardens
I know it's freezing outside (at least here in Chicago) but I am already thinking about next year's garden. I want to do more container gardening because I don't want to add more garden beds (we will be moving in a couple of years).
Here is a good article about how to do successful container gardening, especially in a more urban setting - I plan to follow this advice in the spring!
One thing I always hate about potted plants is their need for water - if we are out of town for more than a day or two, they have a hard time surviving. Here is an interesting idea for using soda bottles as planters and watering stations. If you want something bigger, there is something called an EarthBox that has a watering system built in (it looks like it runs about $30 each for a 29"L x 14"W x 11"H container - it holds 3 gallons of water which sounds great to me!). Or you can make your own for about $15.
Actually, there are many ways to make your own - you can check them out yourself by going to this page.
Wednesday, December 8, 2010
Skills that our Grandparents Had....
We have lost many of the skills that our grandparents and great-grandparents had - while some people still know how to preserve food, garden, etc., many of us have rudimentary skills at best.
I just found a really neat website called Save Our Skills which covers a wide variety of topics, from food preservation to home brewing to DIY projects to bushcraft - really interesting stuff. Check it out!
I just found a really neat website called Save Our Skills which covers a wide variety of topics, from food preservation to home brewing to DIY projects to bushcraft - really interesting stuff. Check it out!
PICKLES!
This summer I grew boatloads of cucumbers. While I love cucumbers, I finally ran out of things to do with fresh cucumbers. So, I decided to make pickles. My Mom couldn’t find her pickle recipe (she made the BEST pickles when I was a kid) so I went searching on the Internet. I found a recipe for Spicy Refrigerator Pickles on Allrecipes.com, and then of course I changed it (because they were making sweet pickles and I don’t like sweet pickles! I also like to use full-sized cucumbers and cut them in half and then into spears (quarters) – I just like the taste better that way (rather than using the official pickling cucumbers).
Since these aren’t officially canned, you must keep them refrigerated. I don’t know how long they last since mine haven’t lasted past 2 months because they are eaten up!
So here is my adjusted recipe for Spicy Refrigerator Pickles. You can make it a spicy as you want by adding more red pepper flakes or dried red peppers. This would also be a great gift if you put it into mason jars and wrapped a ribbon around it!!
Spicy Refrigerator Dill Pickles
Via Allrecipes, with changes by Barb
12 3-4 inch long pickling cucumbers (I used regular cucumbers and only used 3-4 of them)
2 cups water
1 3/4 cups white vinegar
1 1/2 cups fresh dill weed (I just guessed because I left it in sprigs – use a bunch)
2 cups water
1 3/4 cups white vinegar
1 1/2 cups fresh dill weed (I just guessed because I left it in sprigs – use a bunch)
1 T. white sugar
8 cloves of garlic, peeled and smashed
1 ½ T. coarse salt
1 T. pickling spice
1 ½ t. dill seed
½ t. red pepper flakes or to taste (I ended up adding 2 whole red chili peppers to one jar in addition to this)
4 more sprigs of fresh dill weed
- (optional step – makes them crisper) Soak whole cucumbers in ice and water bath for two hours.
- At same time, combine water, vinegar, all but 4 sprigs of fresh dill, sugar, garlic, salt, pickling spice, dill seed and red pepper flakes and let sit at room temp for 2 hours.
- Drain water & chop cukes into spears or thick slices (if using larger cukes). Add cukes to water/vinegar mix (or add it to cukes – you will need a large bowl) and let stand at room temperature for 2 hours.
- Remove the cukes to whatever jars you have (I used 2 one quart jars) – be sure to use a wide mouthed jar to make it easier. Ladle in the liquid from the bowl to cover (you may have to add a little more water/vinegar if it won’t cover the cukes). Distribute spices and garlic cloves among the jars. Place 1-2 sprigs of fresh dill in each jar, along with 1-2 dried red chili peppers depending on how hot you want it. Refrigerate for 10 days before eating (although they were pretty good after 3-4 days). Keep in refrigerator.
Monday, December 6, 2010
Storing Potatoes
It is more economical to buy a large (5 or 10 pound) bag of potatoes, but with just two of us in the house they would go bad before we used them up.
Now we store them in a cardboard box with paper between the layers of potatoes, and we keep the box in our basement (not on the floor, which is a little damp, but on a shelving unit).
They keep for 2 months or more - they might sprout a few "eyes" but just pull them off before cooking (actually, I think you can use those in the spring to plant your own potato plants - I seem to remember doing this with my Mom but it's a little fuzzy....).
Roast a Chicken and Impress Your Family (or Guests)
Well, it's my week to cook, so tonight I am making a roast chicken. It is one of the easiest things in the world to make, but everyone things it is hard and so they are impressed when you make it!! Give it a try sometime - it doesn't take long (work wise) to prepare, but does take a while to cook.
Some hints before you start:
1. Buy a roasting chicken if you can, but a frying chicken is fine. A 3 1/2 to 4 pound chicken will serve four people. If you have more people than that, I would suggest cooking two chickens of the same size rather than one giant chicken (they sell 8 pounders, but I have never tried to cook one). Cooking time should remain the same.
2. I usually roast vegetables along with the chicken (in the same pan) so I will include instructions for that. Feel free to substitute other vegetables, or to leave them out entirely (it won't change the cooking time for the chicken). Put as many or as few vegetables in as you want - I never even measure them.
3. You can also put fresh herbs (tarragon or thyme or rosemary) inside the chicken cavity with the onions for extra flavor.
4. Sometimes we have trouble getting the thighs fully cooked (especially if I forget to let the chicken sit out before roasting) - if they don't look cooked when you carve the bird, just zap that part in the microwave for 30 seconds to a minute and it's fine!
Roasted Chicken with Vegetables
1 chicken (3 to 4 pounds)
2 T seasoned salt
1 T lemon pepper
1 small to medium onion, cut into quarters
Olive oil
Carrots, celery, onion, and potatoes to taste - cut into pieces (1 inch for carrots & celery, wedges for onion, and 1-2 inch hunks for the potatoes).
1. Remove packaging from chicken, and any giblets from the cavity. Rinse well, pat dry inside & out, and set out on counter for 30-40 minutes (this helps it to cook more evenly, and you won't die from it!!).
2. Heat oven to 425 degrees. Rub oil inside chicken cavity and all over outside. Tuck wings under to make a little platform for chicken (look in a general cookbook for instructions on this, or skip this step). Combine seasoning salt and lemon pepper in small bowl. Sprinkle chicken inside and out with seasoning mixture (don't put it all on or it will be too salty). Save the extra seasoning for the vegetables.
3. Stuff inside with quartered onions. I use poultry pins to close the cavity because this makes it easier when you turn the bird. Or, you can truss the bird if you want to (check out this site for details on how to truss the chicken). Place chicken, breast side down, on a rack in a shallow roasting pan.
4. Roast for 30 minutes. Remove from oven, and turn chicken so breast side is up. You may want to sprinkle a little more seasoning on it if it looks pale. Add all vegetables except onions (I toss veggies with olive oil and sprinkle some of the seasoning on them). Just stick them in the roasting pan and spread them around evenly (or semi-evenly). Add onions when there is 30 minutes of cooking time left (see times below) - again, toss with olive oil and a bit of seasoning and then just stick them on top of the other vegetables.
5. Roast until meat thermometer inserted between thigh and leg registers 180 degrees (about 35 more minutes for 3 pound chicken, 45 more minutes for 4 pound chicken).
6. Remove from oven - transfer chicken to platter or cutting board to "rest." Let it rest 10 minutes or so. Meanwhile put veggies in bowl or platter and cover to keep warm.
7. Carve chicken and enjoy (I have to admit that we are unscientific carvers, but if you want to know the right way to do it, go to this site). IMPORTANT: discard the onions that are inside the chicken - only eat the ones that you put in the roasting pan with the other vegetables.
Hope you enjoy this - I have made this many, many times and it is very moist and delicious! Let me know how it goes if you try it!
Sunday, December 5, 2010
Sharing Cooking Duty!!
Since Scott retired, we have shared responsibility for planning and preparing dinner. This would work for any situation, but especially those where both people work or both people are retired!! It gets very tiring for one person to figure out what to eat every day, and splitting the responsibility makes it easier and more fun.
The way we do it is by alternating weeks...that way, whoever is planning/preparing dinners does all the grocery shopping for that week. The effect is to give the other person a total break from thinking about cooking - it makes all the difference! (My favorite moments were when the kids would ask what was for dinner during Scott's week and I would just say "ask your Dad" because I didn't even know!!)
A bonus discovery is that we try different things, and don't get stuck in the rut of fixing the same things over and over. By the time it is my week to cook, I am more interested in trying something different (or I may make some of my favorite things). Luckily, Scott is a great cook too!
And, whoever isn't cooking dinner does the dishes! It works for us - maybe it will work for you!
Saturday, December 4, 2010
Chocolate Covered Nuts (and/or Bark)
I just made some more of these today.....Make your friends or family a gift of chocolate covered nuts or “bark” – it doesn’t take long and makes a nice homemade gift (or just something good to eat for yourself!!).
- Melt chocolate chips of your choice (I like bittersweet or semisweet, but any kind works, including white chocolate) -- put one cup of chips plus one Tablespoon of shortening in a bowl and melt in the microwave on HIGH for 30 second intervals. Stir thoroughly between each interval (even if it hasn’t melted much).
- Once melted, stir in nuts. Put as many nuts as you can fit in the chocolate and coat them all. Any kind of nut is fine. If you want, you can toast them first.
- Drop nut/chocolate mixture on waxed paper at whatever size you like (I do teaspoonfuls). Put it refrigerate for a few hours to harden. After that, they do not need to be refrigerated.
- Wrap in cute bags or however you want, and give them away!!
Options: Sprinkle a little bit of kosher or sea salt on top of each nut cluster before refrigerating (salt and chocolate are amazing together!!). Or season the nuts while toasting them. You can also add dried cranberries or other fruit if you like that. Or skip the nuts and add crushed candy canes. The variations are endless!
You can also make Almond Bark or Pecan Bark or any kind of Bark – just add fewer nuts or more chocolate – spread out on waxed paper in one big piece (as thick or thin as you like) – refrigerate and then break into chunks. You can create a marbled effect by melting dark and white chocolate - put one down first and then drop spoonfuls of the other and twirl a knife or fork in it to make a pattern.
The Spirit of Giving
As we enter the season for Christmas and Hanukkah, many of our thoughts turn to gifts (what to get others, what do we want). One of my favorite things was when my family did the $5 gift exchange – everybody got everyone else a small gift costing no more than $5. Sometimes people would make gifts, sometimes they would get everyone the same gift – it really didn’t matter too much. What mattered was that we each took the time to think about each other.
As a gift giver, I liked this approach better than drawing names and giving “larger” gifts, because it was easier to find something small that someone might like than a more impressive gift that they might already have or might not want.
I also liked it as a gift recipient, because I tend to actually use and enjoy the smaller gifts on a day to day basis. I still think of Joe & Dawn every time I use the fruit colander they gave us (probably 15 years ago). I think of Andy and Alli every time I use the big blue bowl they gave us with popcorn and a movie card. I think of Eddie and Carmen when we use our tiny trash can to play “Pass the Trash.” I think of Jim & DeLinda when we use our head-mounted flashlight. I treasure the jewelry bag that Katie made for me, and use it every time I travel. I think of Steve when I enjoy our expanded pond and waterfall. And on and on……
This is the season of giving, but maybe we should think about why we give presents. And when we enjoy the presents that we are given, we can enjoy thinking about the people who gave them to us.
In the Beginning....
We are constantly trying to simplify our lives – getting rid of some of the “stuff” that suffocates us with the need to maintain it, learning how to be more independent and self-sufficient.
We have learned so much in the past year or two – we have begun to learn some of the things our grandparents knew (such as canning and gardening) and some things they had never heard about (solar power, backup generators). It is a very interesting world around us!!
Throughout this blog we will share with you specific information (such as recipes, tips, and links to other sites) as well as random thoughts and musings. We hope you enjoy it and add to our blog with comments!
Subscribe to:
Comments (Atom)